
A Recent Class
- WarmQuilts
- Feb 7
- 4 min read

Taking a sewing, quilting, or crafting class with a friend gets my vote. We were looking for a quilt class but opted for something different; a fun project that we hadn't tackled before. The Jelly Roll Rug class was one of the first offered in the new year. I signed up with the idea that if I used holiday fabric I would have the entire year to complete the project.

I briefly read through the syllabus. Some items we needed to complete before class day; OK, I thought, how long could that take?
I rearranged the 2.5" wide strips of fabric into a lightest-to-darkest colorwash. Next, I sewed the strips end-to-end, on the diagonal. Total time, including cutting threads and ironing seams open, was 3.5 hours.
Reading through the remainder of the instructions, I held my breath as I read "Your machine needs to be able to do a zigzag stitch". A big gulp, heavy sigh, darn - don't cry . . . I don't have my sewing machine; it burned in the fire. My Featherweight doesn't have a zigzag stitch!
Now was not the time to panic. I thought watching a couple of rug videos would give me some ideas. Pulling out a strip of batting, folding the fabric to mimic a finished tube - that was eight layers! Well, now panic set in. I wondered if the quilt shop had a machine that I could borrow or rent?!
Another sewing machine that I might be able to use had been maintained properly for years. However, it's last service date was unknown. I wondered if it just might need a basic tune-up or would it have a need for more complex repairs? The next day, I made a couple of phone calls to inquire about having the machine serviced - they were 6 and 9 weeks out. That wouldn't work; class was in two weeks.

So, I spent one evening maneuvering through the various stitches - some worked but several others did not work properly. Finally, I convinced myself to go with the three-step zigzag. I took a picture and noted the machine settings as our first hours in class would be using a straight stitch to create the continuous tube.

With our denim needles and full bobbins in place - we were ready. We were shown how to use the fabric tube maker; we pulled our worktables apart from each other to allow the sewn tube to coil in a bin placed below.

The classroom was transformed with sounds of the various sewing machines: clickety-clack, tum-tum-tum, brrrrrrrrrr, tick-tick-tick-tick, whirrrrrrr. Everyone seemed to be finding their own rhythm and friendly conversation ensued. Then, a reminder to check our bobbins as one gal's just ran out.

After our lunch break, we came to a stopping point so we could begin our zigzag work. Yikes! I was holding my breath and hoping I'd get the dials for the stitches, and levers for the length/width all set just right. Next, we searched for the end of the lightest color so we could begin forming our masterpieces.

A brief discussion on technique; pushing two tubes together to form the lightly colored center portion of our rugs. With more discussion and encouragement from our instructor, now we were finally ready.

We checked our bobbins and began our zigzag journey. This was a laborious process for me. With the zigzag out of commission and me opting to use the triple zigzag, my machine made three stitches for everyone else's one stitch. I was so happy to be zigzagging. The instructor reassured me that my tubes would hold under the wear and tear of use because of the extra stitching.

Another shout out to check our bobbins. Some machines were racing on the straightaways, but we mostly slowed our pace as we rounded the ends.

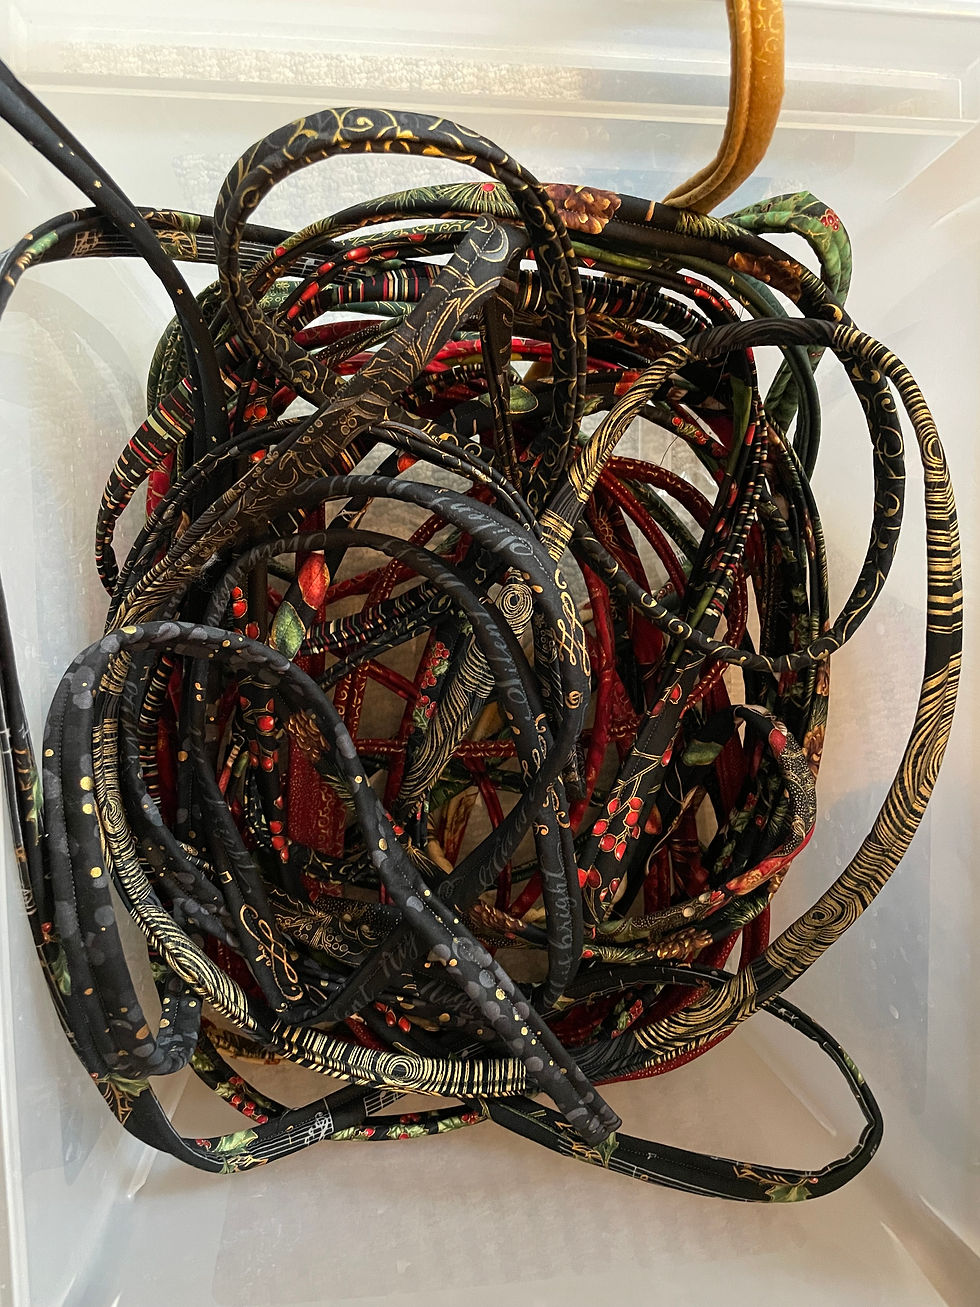
Our ovals expanded, our confidence grew and our class time ran out. With the technique feeling familiar now, each of us packed up and vowed to finish our rugs at home. You can see that mine (above) is about halfway completed.

Working on a flat surface is key, especially after the halfway point. I set up my sewing table next to our guest bed, added some books and packing sheets so the rug could move unimpeded as I reached each rounded end.

The weight, volume and length of the rug continued to expand so it was helpful to have a large flat area to my left. Folding over one end helped as I sewed from the other end.

And, with a total of 15+ hours on this project, I will hand stitch the tail into the end and put away until December when I will enjoy using it during the holidays.
How about you? Are you taking the class you've been dreaming about? Are you working on the same project with a friend, across the miles, and encouraging each other on your weekend accomplishments? Perhaps you are watching videos and tutorials or reading through blogs to gather those secret formulas to assist you in completing your special project.
"For the things we have to learn before we can do them, we learn by doing them." ~Aristotle
I believe the key to learning this technique, like many other skills, is practice and more practice. Having an accountability partner, or partners, in my writing and surface pattern design practices is immensely helpful. Sharing the creative journey in a classroom setting with a friend can be supportive and fun.
While at home, we've checked in on each other to celebrate our progress. She has moved on to creating a second rug, placemats and coasters - she's thriving in her achievements, and I love seeing her growth! My focus was on learning a new skill to complete a project - mission accomplished! And it may be that the secret to finishing holiday gift projects is to start them at the beginning of the year. If only . . .
Thank you for stopping by.
XOXOX


Comments